Homemade Pita Bread: Unbeatable Freshness & Flavor (Better Than Store-Bought)
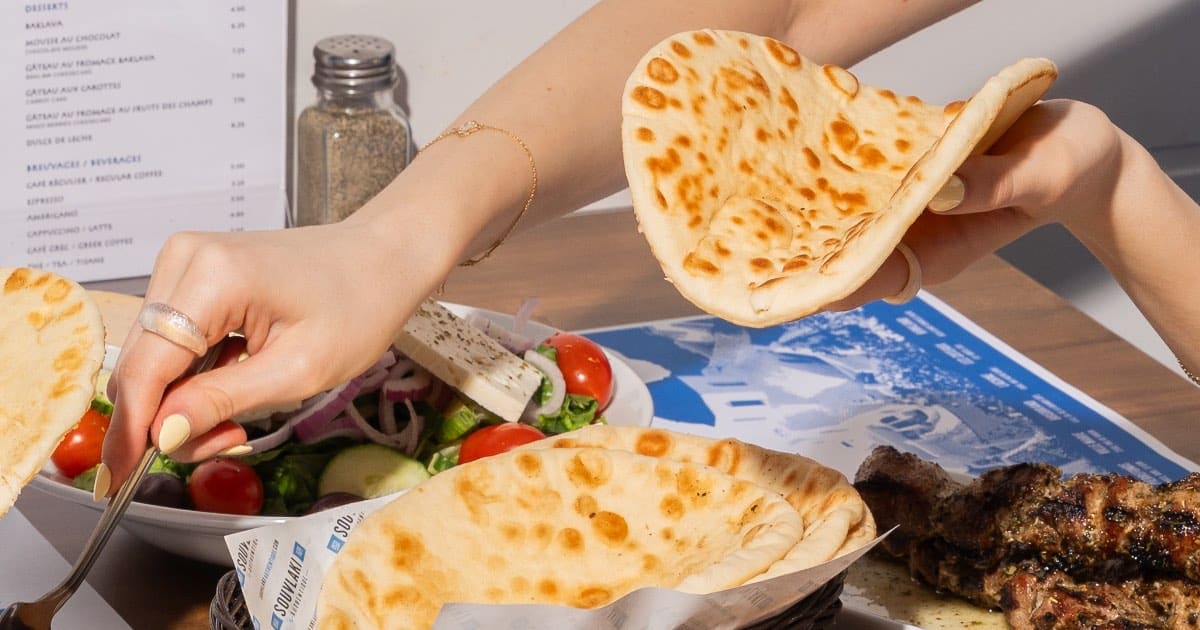
Imagine tearing into a warm, soft, and slightly chewy piece of pita bread, steam gently escaping, its aroma filling your kitchen. Now imagine that same pita was made by your own hands, using just a few simple ingredients. This isn't just a dream; it's the reality of crafting the best authentic homemade pita bread. While store-bought options can be convenient, they simply cannot compete with the unparalleled freshness, flavor, and texture of a freshly baked batch.
Pita bread holds a cherished place in countless cultures, from scooping up creamy hummus and vibrant tabbouleh to cradling savory falafel and succulent shawarma. In Middle Eastern homes, it's an absolute staple, a testament to its versatility and comforting appeal. If you've ever lived away from a region blessed with numerous authentic bakeries, you understand the longing for truly fresh pita. This article will guide you through creating a pita experience that rivals even the finest bakeries, right in your own kitchen.
Why Homemade Pita Reigns Supreme Over Store-Bought
The journey from dough to perfectly puffed pita is a simple one, yet the rewards are immense. When we talk about the best authentic homemade pita bread, we're not just talking about convenience; we're talking about a culinary revelation. Here's why making your own is a game-changer:
- Superior Taste and Texture: Store-bought pita often lacks the tender chewiness and delicate flavor of its homemade counterpart. Fresh pita is incredibly soft, with a subtle tang from the yeast, and a delightful airy quality. It's so good, you might find yourself eating it plain!
- No Preservatives or Unwanted Additives: You control every ingredient. Say goodbye to unknown emulsifiers, dough conditioners, and artificial preservatives. Your homemade pita is pure, wholesome goodness.
- The Magical Pocket: The signature "pocket" of pita bread, formed by steam during baking, is often more pronounced and consistent in homemade versions. This creates the perfect vessel for all your fillings, from traditional labneh and za'atar sandwiches to gourmet wraps.
- Warmth and Aroma: There’s nothing quite like the smell of fresh bread baking, and warm pita straight from the oven is an experience in itself. It elevates any meal, turning an ordinary dish into something special.
- Economical: Making pita at home is incredibly cost-effective. Flour, water, yeast, salt, sugar, and a touch of olive oil are pantry staples, making this a budget-friendly way to enjoy premium bread.
- Versatility Unleashed: Homemade pita isn't just for dipping. Use it as a base for quick pita pizzas, toast it into crispy pita chips for snacking, or simply enjoy it as an accompaniment to a Mediterranean-inspired meal.
The Simple Magic Behind the Best Authentic Homemade Pita Bread
Creating your own authentic pita bread involves just a handful of accessible ingredients. Understanding the role each plays is key to achieving that perfect soft, chewy, and puffy result.
Essential Ingredients for Authentic Pita
- All-Purpose Flour: This is your primary building block. While all-purpose works wonderfully for ease and accessibility, you can experiment with bread flour for a chewier texture due to its higher protein content, or even mix in some whole wheat flour for added nuttiness and fiber. The gluten in the flour is crucial for the dough's elasticity, allowing it to stretch and trap steam, creating that iconic pocket.
- Instant Yeast: The pocket-maker! Instant yeast is incredibly convenient as it doesn't require prior proofing (though slightly warmer water helps kickstart it). It's the yeast that ferments the sugars, producing carbon dioxide that makes the dough rise and ultimately creates the steam pocket during baking. Ensure your yeast isn't expired for optimal results.
- Granulated Sugar (or Honey): More than just a sweetener, sugar is the food source for your yeast, helping to activate it and ensure robust fermentation. A little goes a long way in ensuring your pita rises beautifully.
- Salt: Don't underestimate salt! It's a flavor enhancer, balancing the sweetness and richness of the other ingredients. Without it, your pita would taste bland. For an aromatic twist, consider adding ½ teaspoon of dried herbs like rosemary, oregano, or thyme along with the salt.
- Olive Oil: A touch of olive oil adds wonderful flavor, contributes to the dough's tenderness, and helps keep the pita soft and prevents it from drying out. Use good quality extra virgin olive oil for the best taste.
- Water: The temperature of your water is critical. For instant yeast, aim for a temperature between 120°F and 130°F (49°C to 54°C). Water that's too hot will kill the yeast, while water that's too cold won't activate it effectively, leading to a sluggish rise.
For a detailed breakdown of the exact quantities and a concise recipe guide, explore our Authentic Homemade Pita Bread: Easy 6-Ingredient Recipe Guide.
Crafting Your Own Authentic Pita Bread: A Step-by-Step Guide
The process of making the best authentic homemade pita bread is incredibly rewarding. Follow these steps for perfect results:
- Combine Ingredients: In a large mixing bowl (or the bowl of a stand mixer), whisk together the warm water, yeast, and sugar. Let it sit for 5-10 minutes until frothy, confirming your yeast is active. Then, stir in the olive oil and salt. Gradually add the flour, mixing until a shaggy dough begins to form.
- Knead the Dough: Turn the shaggy dough out onto a lightly floured surface. Knead by hand for about 8-10 minutes, or use a stand mixer with a dough hook for 5-7 minutes, until the dough is smooth, elastic, and no longer sticky. It should feel soft and pliable.
- First Rise: Lightly grease your mixing bowl with olive oil, place the dough in it, and turn to coat. Cover the bowl with plastic wrap or a clean kitchen towel and place it in a warm, dark spot. Allow the dough to rise until it has doubled in size, typically 1 to 1.5 hours, depending on your kitchen's temperature.
- Divide and Shape: Once risen, gently punch down the dough to release the air. Transfer it to a lightly floured surface and divide it into 10-12 equal pieces. Roll each piece into a smooth ball by tucking the edges underneath and rolling it between your palms. Cover the dough balls and let them rest for 10-15 minutes. This resting period helps relax the gluten, making the dough easier to roll.
- Roll Out the Pita: Preheat your oven to its highest setting (usually 475°F-500°F / 245°C-260°C) with a baking sheet, pizza stone, or baking steel inside. This super-hot surface is crucial for the pita to puff. On a lightly floured surface, use a rolling pin to roll each dough ball into a thin, even circle, about 6-7 inches in diameter and about ⅛ inch thick. Aim for even thickness to ensure uniform puffing. You can place the rolled-out pitas on lightly floured squares of parchment paper to prevent sticking.
- Bake to Perfection: Carefully transfer a rolled-out pita (or two, depending on your baking surface size) directly onto the preheated baking sheet or stone. Bake on the bottom rack for 2-4 minutes. Watch closely! The pita will dramatically puff up like a balloon. Once it's lightly golden brown and fully puffed, remove it from the oven.
- Admire and Enjoy: Transfer the hot pita to a clean kitchen towel and cover it to keep it soft while you bake the remaining pitas. Once slightly cooled, tear open one of your freshly baked pita rounds and marvel at the beautiful pocket you've created!
Achieving Pita Perfection: Expert Tips for Success
While the recipe itself is straightforward, a few expert tips can elevate your homemade pita from good to truly exceptional:
- Kneading is Key: Whether by hand or mixer, proper kneading develops the gluten network, which is essential for the dough's elasticity and its ability to trap steam and puff. Don't skimp on this step.
- Dough Consistency: The ideal dough should be slightly sticky but not adhere to your fingers. Adjust the flour amount incrementally based on humidity levels. Too much flour will result in dry, tough pita; too little will make it hard to handle.
- Even Rolling: This is perhaps the most crucial tip for uniform pockets. Roll your dough out as evenly as possible. If one part is thicker than another, the steam will concentrate in the thinner areas, leading to uneven puffing or no puffing at all.
- Hot, Hot Oven: A scorching hot oven and preheated baking surface (baking stone or steel is ideal, but a heavy baking sheet works well) are non-negotiable. The sudden blast of intense heat causes the moisture in the dough to rapidly turn into steam, which then separates the layers of dough, creating the pocket.
- Don't Overbake: Pita bakes quickly. Overbaking will make it stiff and dry. You want it to be lightly golden, not deeply browned.
- Keep it Covered: As pitas come out of the oven, stack them and cover them with a clean kitchen towel. The residual heat and steam will keep them soft and pliable.
- Freezing for Future Feasts: Homemade pita freezes beautifully. Once completely cooled, store them in an airtight freezer bag for up to 3 months. Reheat them briefly in a warm oven or microwave for a fresh-like experience.
For more insights on making pita a regular part of your meal planning, explore our Simple Homemade Pita Bread: Your Go-To Recipe for Versatile Meals.
Conclusion
Embarking on the journey to make homemade pita bread is a culinary adventure you won't regret. The satisfaction of pulling warm, puffy rounds of bread from your oven, knowing they are made with love and simple, wholesome ingredients, is truly incomparable. Say goodbye to bland, dry store-bought versions and say hello to the unbeatable freshness and flavor of the best authentic homemade pita bread. It's a simple recipe that yields extraordinary results, transforming your meals and delighting your taste buds.
